Spring Activities 2019
| 19th April 2019Over the past two years or so I have found it difficult to find the time to blog and share my experiences with you – however, life is beginning to settle down a little now so I would like to continue sharing my experiences with you regarding my interest and love of natural dyes.
I hope you enjoy my updated website. As always, I would love to hear from folk who share the same interest.
Walking around the garden with the sun shining and the birds singing it is such a joy to see the dye herbs peeping through what appears to have been a lifeless area for many months now. In particular the madder beds are looking strong as are the dyer’s chamomile plants and the dyer’s greenweed.
The weld is now making an appearance and the soapwort is looking very healthy.
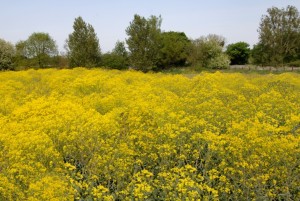
Last years woad has now shot up and are showing their yellow flowering heads, which will of course, provide me with a fresh supply of seeds later on.

Last years woad coming into flower
In the polytunnels the Japanese indigo plants are looking great – the Indigo tinctoria as always trailing behind but I am hopeful that they will eventually rise and shine!
MADDER (Rubia tinctorum)
I am often asked about how to grow and when to harvest madder so I will talk a little on how I have grown madder over the last few years.
The roots of this ancient plant are rich in alizarin and the source of a strong red dye. It is a perennial plant growing to a height of 100cm.
It has slender jointed stems which are covered with short prickly leaves.
The demand for madder seeds and rhizomes has increased considerably as people are once again becoming more interested in the craft of natural dyeing. Consequently, I decided a few weeks ago to plant madder seeds in the polytunnel for sale as plug plants so I will be adding them to my website shortly as another option to purchase.
If you haven’t yet sown your madder seeds – Rubia tinctorum – you still have time – seeds available from my online shop.
When using seeds, I like to sow them individually in coir pots as I feel I can control the temperature and moisture levels more successfully than by direct sowing. When direct sowing it is easy to lose emerging seeds as they can often be smothered by weeds or indeed be mistaken for a weed and plucked out before they have the opportunity to become established.
Sowing indoors – sow seeds ½ inch deep in moist compost and keep evenly moist. Do not overwater as you could actually cause the seed to rot before it has the opportunity to germinate. If possible, place the pots on a heating pad until germination. Young plants can be transplanted into their designated bed once they established a few sets of leaves.
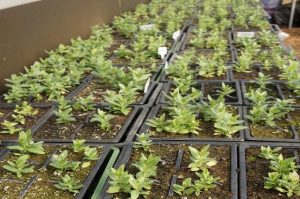
Madder seedlings ready for transplanting
Creating madder beds needs careful thought and planning as madder plants do spread very quickly. Their underground rhizomes creep underground and can quickly become invasive if you plant them with other plants and it will be difficult to harvest the rhizomes at a later date.
I have a four-year management cycle. I would suggest – in the first year you plant the whole bed and plan to divide the bed into four equal sections for a staggered harvest.
Set the plants 18 inches apart and keep the beds weeded.
Ideally, the rhizomes are harvested for dyeing when they are 4 years old – so –
Harvest one section of your bed in the autumn of the second year, when the roots are two years old and replant.
Harvest the next section in the autumn of the third year, when the roots are three years old and replant.
Harvest the final section in the autumn of the fourth year, when the roots are four years old and replant.
In the autumn of year five you can dig up the first section which should now produce a healthy stock of pencil-thick roots suitable for using as a dye medium.
Continue this yearly rotation and you will have an annual supply of madder roots suitable for the dye pot.
Madder prefers a light sandy soil. Plants grown in fertile well-limed soils tend to produce more pigment in their root.
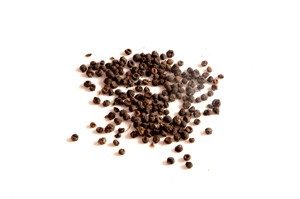
In August madder produce pretty, tiny yellow star-shaped flowers eventually turning to seed in October. Initially, the seeds are black and glossy – changing to what resembles black peppercorns.
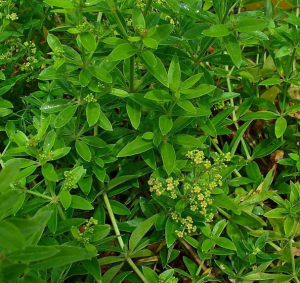
At the end of the year madder dies back to soil level and looks like dried straw, so this is an ideal time to mulch over with well- rotted manure.
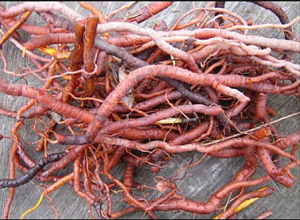
Example of what you will receive.
Madder rhizomes are also available for sale from my online shop – thus saving a year or two whilst waiting for the seeds to develop their root system.
For information on how to dye with madder visit my how-to page.


